In this day and age, A/C units are a dependable and easy-to-install option for controlling temperature in your living space whilst also avoiding the pricey installation of a central A/C system. Best of all, once the summertime heat subsides, these ACs could be effortlessly dismounted for storage. One could use the window ledge for different objectives.
Vital Questions to Take into Consideration Before Installing an AC unit
What type of house do you have?
Is it a separate balcony? Is it a smaller flat with a balcony? Your house’s type influences the exact location of your AC system. You want to avoid fire hazards, you want to meet noise regulations, there are many things to keep in mind here.
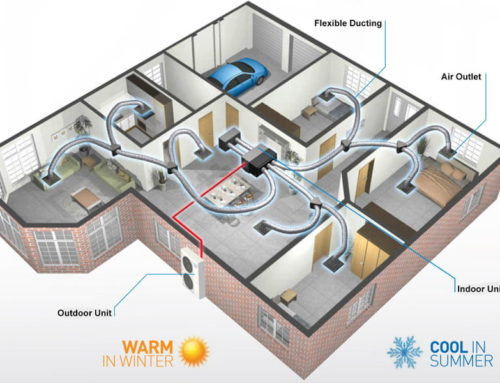
Which living spaces do you want to cover?
Based on your response to this important question, you either choose are more powerful AC (for example, a fully integrated one) or a split-system AC. Be sure to choose carefully!
What are the living space’s measurements?
ACs come in innumerable sizes and chilling capabilities, so it is pivotal to select the one that best suits the requirements of any given living space. Figure out the square footage of the living space you want to freshen up and find the most suitable AC. If the space in question is uncommonly hot or chill, you could fine-tune the air cooler capability appropriately.
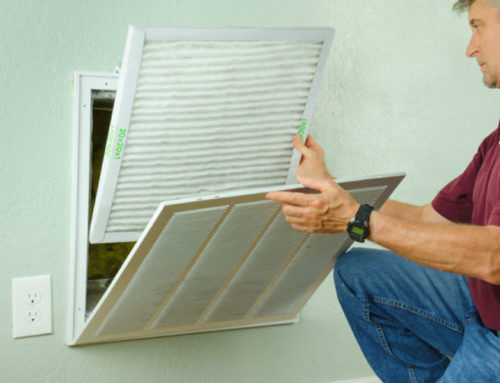
How many windows are there?
It’s one of the most important things that you have to take into consideration.
What energy efficiency ratio do you need?
Taking into consideration the unit’s EER ratings is going to help you save money. We also suggest finding ACs that have a «sleep function».
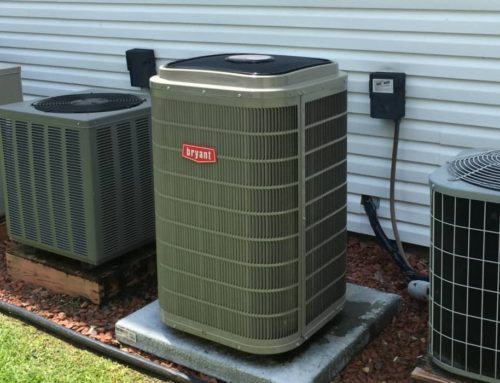
What’s the best spot for the outside unit?
If at all possible, your outside unit has to be placed where there’s enough free space on both sides to facilitate good air circulation and simple access for possible repairs. Three of the most popular positions for the outside unit are 1) concrete pad 2) outside wall 3) rooftop.
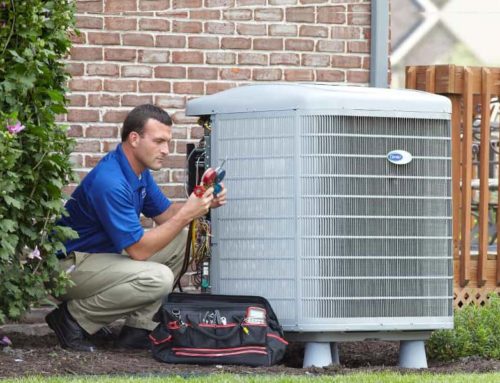
Should you really install AC on your own?
If you don’t have enough experience when it comes to AC installation, you might end up overspending instead of cutting costs as it was originally intended. You might end up doing something wrong and that might cause damage to your AC or, God forbid, your well-being. You can contact Ace Air’s qualified team of installers by calling 714-786-8225 if you still have any doubts.
Step-By-Step Installation Guide
Step #1. Installing the Inside Unit.
Here’s a brief step-by-step guide for AC unit installation, in case you opt to do it yourself.
2.1. Choose an unobstructed spot on your inside wall to install the inside AC unit.
Be sure to remember that you need to pick the spot based on: a) sunlight direction b) heating sources c) power lines placement d) proximity of various electrical devices. Don’t forget to install the unit at least ~2.14 meters above the ground level, on a wall that is sturdy enough to hold the unit’s weight.
2.2. Lock the mounting bracket to the inside wall.
Make sure it’s parallel with the ground, drills holes into the wall to insert plastic anchors and screws that will hold it in place.
2.3. Make a hole for the pipe.
Take into consideration the measurements of the pipe and the proximity of the external unit. After the whole is made, insert a flexible rubber flanged bellow into it.
2.4. Connect the pipes.
2.5. Lock the unit in place by pressing it against the mounting bracket.
Step #2. Installing the External Unit.
2.1. Pick the best spot for its installation.
The unit needs at least 30.5 cm of free space around to make sure it operates in a proper manner.
2.2. Lay the concrete slab on the ground and make sure it’s parallel with it.
You have to use foam rubber beneath the concrete to make sure that the unit won’t make loud vibrating noises on a regular basis. Also, be sure to remember that your external unit needs to be high enough, so it’ll be above the snow during the winter.
2.3. Connect the wires.
Consult with the AC’s wiring schematics to make sure the wires are connected right. Doing this «by the book» is vital to your success.
2.4. Fasten the cables and pipes’ flare fittings with the matching pipes on the exterior unit.
Step #3. Completing the Installation.
3.1. Use a vacuum pump to purge air from the exterior unit.
3.2. Insulate the piping.
3.3. Secure the pipes to the wall with fasteners.
3.4. Seal up the outside hole with Urethane Foam.
Alternative Route
Step #1. Request a Quote from an Ace Air Installation Specialist.
Our specialists will help you assess every factor that might influence the installation process. They’ll give you a personalized step-by-step rundown of the installation process and leave with an exhaustive written quote.
Step #2. Sit Back and Enjoy Yourself.
Pretty self-explanatory, isn’t it?
Our workers will finish the installation, test your AC, pipes, air circulation balance, and many other things from the checklist. Lastly, they’ll clean your living space, leaving it spotless, shipshape, and comfortable like never before.

Final Q&A
There are still some unanswered questions that we want to bring up!
Does the length of the pipe impact the capabilities of an AC unit?
This is one of the most frequently asked questions. The short answer is – yes, it does. Shorter length means better capabilities and vice versa. Never try to extend the pipe beyond what’s needed or suggested by the manufacturer.
Can I install an AC if there’s a preinstall in my house?
Yes, you can. In fact, it’s going to be much easier for you.
Should I try to install an AC if I have no prior experience with it?
No, you really shouldn’t. There are way too many things to take into consideration. There’s a huge risk of you ruining the unit thanks to improper installation form, so to speak. You can also harm yourself and others. Don’t try to install an AC unit unless you’re 100% sure you can do it.